What is OctoPrint for Tevo Tarantula?
OctoPrint is a powerful, open-source web interface that gives you complete control over your 3D printer, including the Tevo Tarantula. It allows you to monitor and control your printer remotely, upload files, start and stop prints, and even view live video feeds of your printing process. This setup is particularly beneficial for printers like the Tevo Tarantula, known for its robust build and active community. The software runs on a separate device, usually a Raspberry Pi, and connects to your printer via USB. This setup eliminates the need to constantly interact with the printer’s control panel, offering a much more streamlined and convenient 3D printing experience. With OctoPrint, you can manage your prints from anywhere with an internet connection, opening up new possibilities for your 3D printing projects.
Benefits of Using OctoPrint
The advantages of using OctoPrint with your Tevo Tarantula are numerous. Firstly, remote control is a significant benefit. You can start, pause, and stop prints from your computer or smartphone, which saves time and allows for greater flexibility. Secondly, OctoPrint offers print monitoring. You can keep an eye on your print’s progress through a webcam, providing peace of mind and the ability to intervene if necessary. Furthermore, OctoPrint facilitates file management, allowing you to upload, organize, and slice your 3D models directly from the web interface. It also supports a wide array of plugins that extend its functionality, enabling features such as time-lapse videos, filament runout detection, and more. Overall, OctoPrint enhances the 3D printing workflow, making it more efficient and user-friendly.
Why Use OctoPrint with Your Tevo Tarantula

The Tevo Tarantula is a popular 3D printer, and OctoPrint is a perfect match for it. OctoPrint simplifies the printing process, enhancing the user experience. Many users find the stock interface of the Tevo Tarantula to be somewhat limited. OctoPrint overcomes these limitations, providing a more sophisticated and intuitive way to manage your prints. Additionally, the Tevo Tarantula community is very active, and there is a wealth of online resources, tutorials, and plugins specifically designed for use with this printer and OctoPrint. The ability to monitor prints remotely is also a major advantage, as it allows you to avoid constant supervision, especially during long print jobs. Ultimately, OctoPrint maximizes the potential of the Tevo Tarantula, leading to improved print quality and greater overall satisfaction.
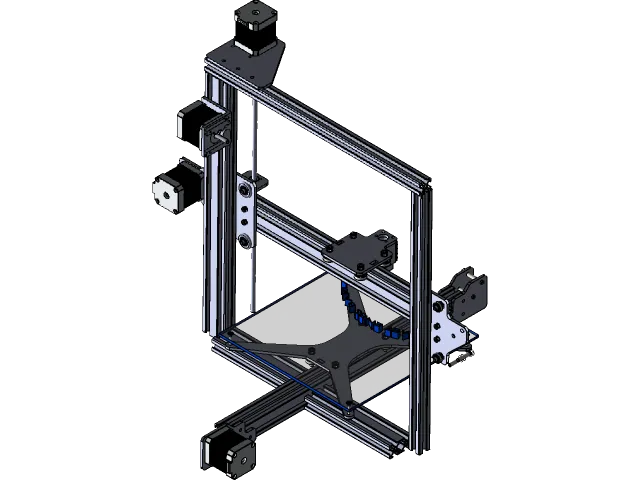
Preparing Your Tevo Tarantula for OctoPrint
Before you begin, ensure your Tevo Tarantula is in good working order. Check the mechanical components like belts, bearings, and the hotend to ensure they are properly maintained. Also, make sure your printer’s firmware is up to date. While not strictly necessary, updated firmware often improves print quality and compatibility with OctoPrint. Gather the necessary tools, including a USB cable to connect your Tevo Tarantula to the OctoPrint server (usually a Raspberry Pi). Finally, prepare the physical space around your printer. You’ll need to position the Raspberry Pi and any attached peripherals, such as a webcam, in a way that allows you to monitor and control the printer comfortably and safely.
Hardware and Software Requirements
The primary hardware you’ll need is a Raspberry Pi (any model from Pi 3B or newer is recommended) and a microSD card (at least 8GB, 16GB is preferable). A power supply for the Raspberry Pi and the Tevo Tarantula is also necessary. You may also want to consider a webcam for print monitoring and a case to protect your Raspberry Pi. In terms of software, you’ll need to download the OctoPrint image from the official website. This image contains all the software required to run OctoPrint. Additionally, you might need a slicer like Cura or PrusaSlicer to create the G-code files that OctoPrint will send to your Tevo Tarantula. Make sure your Raspberry Pi has a stable network connection, either via Ethernet or Wi-Fi. Ensure your Tevo Tarantula’s firmware is compatible with OctoPrint.
Choosing Your OctoPrint Hardware

The Raspberry Pi is the heart of your OctoPrint setup. While any model from Raspberry Pi 3B or newer will work, the Raspberry Pi 4 offers the best performance due to its faster processor and more RAM. Consider the amount of USB ports on your Raspberry Pi, as you’ll need one for the Tevo Tarantula and potentially another for a webcam. When selecting a microSD card, choose a reputable brand and a card with a high read/write speed to ensure smooth operation. If you plan to use a webcam, choose one that’s compatible with the Raspberry Pi. Some webcams require specific drivers or configurations. Finally, don’t forget about a power supply. Make sure it provides enough power for your Raspberry Pi and any connected peripherals. A stable power supply is critical for reliable operation.
Raspberry Pi as OctoPrint Server
The Raspberry Pi acts as the server for OctoPrint, running the software and communicating with your Tevo Tarantula. It’s essentially a small, low-power computer that sits between your printer and your network. This setup allows you to control your printer wirelessly and monitor prints remotely. The Raspberry Pi handles all the processing tasks, such as interpreting G-code, controlling the printer’s movements, and streaming video from a webcam. Its compact size and low power consumption make it an ideal choice for this purpose. The Raspberry Pi also provides a platform for installing plugins, expanding OctoPrint’s functionality. This includes advanced features such as remote monitoring, time-lapse photography, and filament runout detection. Using a Raspberry Pi keeps your Tevo Tarantula free from the added processing load.
Installing OctoPrint on Raspberry Pi
The installation process is relatively straightforward. First, download the OctoPrint image from the official website. Next, you’ll need to flash the image onto your microSD card using a software like BalenaEtcher. Once the image is flashed, insert the microSD card into your Raspberry Pi. Connect a monitor, keyboard, and mouse to the Raspberry Pi (at least for the initial setup). Power on the Raspberry Pi. It will boot up, and you’ll need to configure your Wi-Fi connection (if not using Ethernet), change the default password, and configure your network settings. Access OctoPrint via the web browser by typing the Raspberry Pi’s IP address or hostname into the address bar. If everything is set up correctly, you should see the OctoPrint interface, ready for configuration.
Flashing the OctoPrint Image

Flashing the OctoPrint image onto the microSD card is a crucial step. It involves writing the OctoPrint software onto the card so that the Raspberry Pi can boot from it. Begin by downloading the OctoPrint image from the official website. Then, download a software like BalenaEtcher, which is designed to flash images onto SD cards. Insert the microSD card into your computer, select the downloaded OctoPrint image in BalenaEtcher, and choose the correct drive corresponding to your SD card. Click on “Flash” to start the flashing process. This process can take a few minutes. Once completed, safely eject the microSD card from your computer. Now, your microSD card is ready to be used with your Raspberry Pi.
Connecting Your Tevo Tarantula to OctoPrint
Connecting your Tevo Tarantula to OctoPrint involves physically connecting the printer to the Raspberry Pi and then configuring the software to communicate with your printer. Use a USB cable to connect the Tevo Tarantula to a USB port on your Raspberry Pi. Make sure the printer is powered on. This connection allows OctoPrint to send commands and receive data from your printer. Once the printer is connected, you’ll need to configure the connection settings within the OctoPrint interface. This involves selecting the correct serial port and baud rate. OctoPrint will then attempt to establish communication with your Tevo Tarantula.
Setting up the Connection
Inside the OctoPrint web interface, navigate to the ‘Connection’ tab. Here, you’ll find options to configure the connection to your Tevo Tarantula. Select the serial port corresponding to your printer. This port is usually identified by the system. Also, select the correct baud rate for your Tevo Tarantula. The default baud rate is often 115200, but it’s crucial to verify this information in your printer’s documentation or settings. Once you have selected the correct serial port and baud rate, click on ‘Connect’. OctoPrint will then attempt to establish a connection with your printer. You should see connection status indicators changing to indicate whether the connection was successful. If the connection fails, double-check your settings, USB cable, and printer power.
Configuring OctoPrint for Tevo Tarantula

After successfully connecting your Tevo Tarantula, you’ll need to configure OctoPrint to work optimally with your printer. This involves setting up printer profiles, configuring slicing settings, and adjusting other parameters to match your printer’s specifications. Within the OctoPrint interface, you can access the printer profile settings. Create a new profile for your Tevo Tarantula, entering the printer’s bed size, nozzle diameter, and other relevant specifications. This information will ensure accurate print results. You can also configure your slicer settings directly within OctoPrint, or you can import G-code files created using an external slicer. Tuning the printer settings can improve print quality and overall performance. Experiment with these settings to find the optimal configuration for your Tevo Tarantula.
Printer Settings
The printer settings in OctoPrint define how your Tevo Tarantula will behave during the printing process. Access the printer profile settings to input your printer’s specifications. This includes the printable area (X, Y, and Z dimensions), the nozzle diameter, and the type of heated bed you are using. Correctly setting these values ensures that OctoPrint knows the boundaries of your printer’s bed and can accurately control the printing process. Also, configure the firmware settings within OctoPrint, selecting the correct firmware type for your Tevo Tarantula. This is crucial for communication between OctoPrint and your printer’s control board. It’s also recommended to calibrate your printer’s steps per millimeter (steps/mm) for each axis and to fine-tune the Z-offset to achieve perfect first layers. Proper printer settings result in higher-quality prints.
Controlling Your Tevo Tarantula with OctoPrint
Once OctoPrint is configured, you can start controlling your Tevo Tarantula remotely. Upload your G-code files to OctoPrint using the web interface. Then, you can use the controls within OctoPrint to preheat the bed and nozzle, adjust temperatures, and start the print. The interface allows you to monitor the progress of your print in real-time, viewing layer-by-layer progress, temperatures, and other important data. You can also control the printer’s movement (e.g., moving the print head) and initiate homing sequences. In addition to these basic controls, OctoPrint provides a G-code viewer, which allows you to visualize the path the printer will take. Experiment with these controls to familiarize yourself with the process.
Uploading and Slicing Files

OctoPrint simplifies the process of uploading and preparing your 3D models for printing. You can upload your STL or other model files directly to the OctoPrint interface. Once uploaded, the models need to be converted into G-code, a set of instructions that your Tevo Tarantula understands. You can either slice your models directly within OctoPrint using the built-in slicer (based on CuraEngine), or you can use an external slicer like Cura or PrusaSlicer. If you use an external slicer, export the G-code file and upload it to OctoPrint. Before starting the print, verify that the G-code is correctly generated and that it matches your printer’s settings. Make sure you have the proper filament selected and the print bed is clean and ready to receive the first layer.
Monitoring Prints
One of the most useful features of OctoPrint is its ability to monitor your prints remotely. If you have a webcam connected, you can watch your print in real-time through the web interface. This allows you to keep an eye on the progress of the print and to identify any issues that may arise, such as filament tangles, bed adhesion problems, or print failures. You can also view the temperature of the hotend and the bed, the current layer being printed, and the estimated time remaining. OctoPrint also provides you with detailed statistics about your print, including the amount of filament used and the total print time. This data can be helpful in troubleshooting issues and optimizing your printing process. Consistent monitoring with the webcam can help you catch potential problems early, saving filament and time.
Advanced OctoPrint Features
OctoPrint offers a wealth of advanced features that can significantly enhance your 3D printing experience. One such feature is the ability to create time-lapse videos. By automatically taking snapshots during the printing process, OctoPrint can compile a time-lapse video of your print, showing the entire printing process from start to finish. Another advanced feature is filament runout detection. With the appropriate hardware and plugin, OctoPrint can detect when your filament spool is running low and automatically pause the print, giving you time to replace the filament. OctoPrint also supports G-code scripts, allowing you to automate tasks such as bed leveling or turning off the printer after a print is complete. Learning these advanced features can drastically improve your 3D printing experience.
Using Plugins

One of the biggest strengths of OctoPrint is its extensive plugin ecosystem. Plugins allow you to extend the functionality of OctoPrint in numerous ways. You can find plugins for various purposes, such as controlling LED lights, monitoring power consumption, and integrating with cloud services. To install a plugin, navigate to the Plugin Manager in the OctoPrint settings and search for the desired plugin. Click ‘Install’ to download and install the plugin. After installation, you might need to configure the plugin within the OctoPrint settings. Plugins can significantly enhance your 3D printing workflow. Make sure you check the plugin compatibility and reviews before installing any plugin to ensure it works well with your printer and setup. Always restart OctoPrint after installing or configuring a plugin.
Remote Access
One of the primary benefits of using OctoPrint is the ability to access your 3D printer remotely. To enable remote access, you’ll need to configure OctoPrint to be accessible over the internet. This typically involves setting up port forwarding on your router, so that traffic to a specific port on your router is directed to your Raspberry Pi. Another option is to use a service like OctoPrint Anywhere or OctoPrint’s built-in support for remote access. These services provide a secure way to access your OctoPrint instance without the need for complex network configuration. Once you’ve enabled remote access, you can monitor and control your Tevo Tarantula from anywhere with an internet connection, which is especially useful when you are away from home. This feature offers flexibility and allows you to start prints, monitor progress, and troubleshoot issues from anywhere.
Troubleshooting Common OctoPrint Issues
Setting up OctoPrint on your Tevo Tarantula, although usually straightforward, can sometimes lead to problems. Knowing how to troubleshoot these issues can save time and frustration. Before you start, make sure the basics are correct: the printer is connected, the power is on, and the USB cable is securely plugged in. If the connection fails, check the serial port and baud rate settings in OctoPrint to make sure they match your printer’s configuration. Often the printer’s manual will have the correct configuration. Also, verify that your printer’s firmware is compatible with OctoPrint. Check your network connection to ensure the Raspberry Pi can access the internet. Many issues can be solved by simply restarting your Raspberry Pi and Tevo Tarantula. Checking the OctoPrint logs will often pinpoint the underlying cause of the issue.
Connectivity Problems
Connectivity problems are a common issue when setting up OctoPrint. The first thing to check is the physical connection between your Tevo Tarantula and the Raspberry Pi. Ensure the USB cable is securely connected and that it’s a data transfer cable, not just a charging cable. Confirm that the printer is powered on. In the OctoPrint interface, double-check that you have selected the correct serial port and baud rate for your printer. If you still cannot connect, try restarting both your printer and the Raspberry Pi. Also, check the OctoPrint logs for any error messages. These logs can provide valuable clues about the cause of the connectivity problem. Consider trying a different USB cable and a different USB port on the Raspberry Pi. Sometimes, the USB port itself can be faulty.
Print Quality Issues
Sometimes, despite successful setup, you may encounter print quality issues with OctoPrint. These issues can range from poor bed adhesion to layer shifting or extruder problems. If you’re experiencing bed adhesion problems, ensure that your bed is properly leveled, and use the appropriate bed adhesion methods (e.g., glue stick, painter’s tape). If you’re seeing layer shifting, check the belts on your Tevo Tarantula to ensure they are tight and that the printer’s frame is stable. If you are experiencing extruder issues, verify that the nozzle temperature is correct for your filament, and that the extruder motor is working correctly. Also, ensure that your G-code is correctly generated. In OctoPrint, you might adjust the printer profile settings or the slicer settings to calibrate your printer for better print quality. Troubleshooting these issues requires patience and attention to detail.