
Understanding Tevo Tarantula and Cura
Achieving perfect prints with your Tevo Tarantula 3D printer hinges on a deep understanding of its capabilities and the slicing software you use. This guide delves into the optimal Cura settings to help you unlock the full potential of your printer. We’ll explore essential settings, troubleshooting tips, and advanced techniques, empowering you to create high-quality 3D models consistently. This is not just about inputting numbers; it’s about understanding how each setting impacts the final print, allowing you to fine-tune for different materials, designs, and desired outcomes. By mastering these settings, you’ll transform your Tevo Tarantula from a basic 3D printer into a precision machine capable of producing professional-grade results.
What is the Tevo Tarantula 3D Printer?
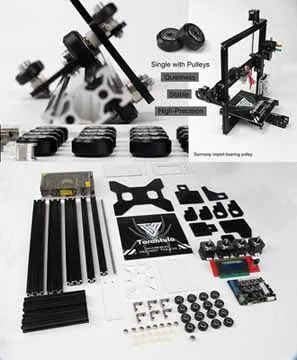
The Tevo Tarantula is a popular and affordable DIY 3D printer known for its ease of assembly and large build volume, making it a favorite among hobbyists and beginners. It’s a Cartesian-style printer, which means it moves its print head along the X, Y, and Z axes to deposit filament layer by layer. Its open-frame design allows for easy access to the print bed and components, facilitating adjustments and maintenance. While it may not have the bells and whistles of more expensive printers, the Tevo Tarantula offers excellent value and the flexibility to experiment with various materials and techniques. Understanding its mechanics, like the heated bed and Bowden extruder system, is crucial for optimizing your Cura settings.
What is Cura Slicer?

Cura is a free, open-source slicing software widely regarded as one of the best for 3D printing. It translates 3D models (like STL files) into instructions that your 3D printer can understand. Cura allows you to control a myriad of print parameters, from temperature and speed to support structures and infill density. Its intuitive interface, extensive customization options, and user-friendly profiles make it an ideal choice for both novice and experienced users. Cura’s popularity stems from its active community, ensuring regular updates, and a vast library of readily available profiles for various 3D printers and materials. Effectively using Cura is critical in determining your print quality.
Why are Cura Settings Important?
Cura settings are the key to transforming a digital 3D model into a physical object. They dictate how your Tevo Tarantula will behave during the printing process, directly influencing print quality, accuracy, and the structural integrity of the final product. Incorrect settings can lead to a range of issues, from warping and poor layer adhesion to stringing and failed prints. Proper settings will allow you to utilize the full potential of your printer and your chosen filament. Experimenting with these settings allows you to tailor your prints to a wide variety of materials, which allows for creativity and the creation of objects based on your specifications.
Essential Cura Settings for Tevo Tarantula
Getting started with the Tevo Tarantula in Cura involves configuring several key settings. These settings are the foundation upon which you build to achieve high-quality prints. We’ll break down these settings in the sections that follow, covering everything from printer setup and print head calibration to temperature control and print speed settings. Understanding and correctly configuring these essential settings is your first step toward successful 3D printing with your Tevo Tarantula. This initial setup will prepare you to create more complex designs and experiments.
Setting Up Your Tevo Tarantula in Cura

Before you begin, you must add your Tevo Tarantula to Cura. This usually involves selecting the printer from a pre-defined list or manually entering its specifications, like build volume, nozzle diameter, and bed type. These details are essential for Cura to accurately generate the print paths. Make sure your printer’s dimensions are properly configured to avoid print issues. Also, confirm that the printer’s firmware is updated, as newer versions often contain bug fixes and performance improvements. This process ensures that Cura can accurately communicate with your printer and interpret your settings.
Printer Settings
Within the Printer Settings section, specify the build volume dimensions, nozzle size, and heated bed characteristics of your Tevo Tarantula. These settings tell Cura the usable area and the type of printing surface available. The nozzle size is a crucial factor in determining print resolution and the amount of filament extruded per layer. Correctly configuring the bed type (e.g., glass, BuildTak) is critical for bed adhesion and print success.
Printhead Settings
Adjust the print head settings in the ‘Machine Settings’ section. These settings include the nozzle diameter (often 0.4mm), the retraction settings to minimize stringing, and any necessary adjustments to the Z-offset. The Z-offset is vital for the first layer adhesion. If the nozzle is too close, it can scratch the bed; if it’s too far, the filament won’t stick. Experiment with the Z-offset to find the optimal distance for your specific setup.
Bed Settings
Bed temperature is a critical factor, especially when printing with ABS or other materials prone to warping. The heated bed helps the first layers of your print stick to the bed, preventing them from lifting during the print. The optimal bed temperature varies based on the material being used. PLA typically requires a bed temperature of 50-60°C, while ABS often benefits from a temperature of 100-110°C. Ensure your bed is properly leveled, as this will affect the first layer’s adhesion, which is the foundation of your entire print.
Material Settings
Material settings, such as the filament type and its corresponding printing temperature, play a significant role in print quality. The most common filaments are PLA (Polylactic Acid) and ABS (Acrylonitrile Butadiene Styrene). Select the correct filament type in Cura, and specify the recommended printing temperature for your chosen material. For instance, PLA typically prints between 190-220°C, while ABS typically requires a higher temperature range of 230-250°C. Additionally, adjust the filament diameter to match your filament spool, typically 1.75mm.
Print Speed and Temperature Settings
These settings have a direct impact on print quality and printing time. Experimenting with these settings will give you a better understanding of how your machine works. Finding the right balance requires a bit of trial and error, but the results are rewarding. Understanding this relationship will help you achieve the perfect balance between speed and quality.
Print Speed

Print speed refers to how fast the print head moves. Faster speeds can reduce print time but may compromise quality, especially with intricate designs. Start with a moderate print speed of 50-60 mm/s for general printing and gradually increase the speed if the print quality remains good. For detailed prints, slowing the print speed to 30-40 mm/s can improve the accuracy and reduce issues like ringing. The optimal speed is a balance of speed and quality, so test different settings to find the ideal values for your prints.
Temperature
Temperature is a critical setting for melting and extruding the filament. The recommended printing temperature range is usually listed on the filament spool. Generally, PLA is printed between 190-220°C, and ABS is printed between 230-250°C. Printing too hot can cause stringing and oozing, while printing too cold can lead to poor layer adhesion and nozzle jams. Fine-tune the temperature in increments of 5°C to find the optimal value for your filament and printer. The correct temperature ensures that the filament melts correctly and bonds properly, resulting in a strong and accurate print.
Retraction Settings
Retraction is a critical setting that prevents stringing, the unsightly thin strands of filament that appear between parts of your printed model. Retraction settings involve retracting the filament from the nozzle when the print head moves between different locations. This prevents the filament from oozing out and creating strings. Fine-tuning these settings can significantly improve print quality.
Retraction Distance

Retraction distance is the amount of filament retracted back into the nozzle. For Bowden extruder systems, like the Tevo Tarantula, a longer retraction distance is usually required (typically 5-7mm). In direct drive systems, a shorter distance (1-2mm) is sufficient. Experiment with this setting to eliminate stringing without causing clogs. Start with the recommended settings for your filament and printer type, and then adjust incrementally.
Retraction Speed
Retraction speed determines how quickly the filament is retracted and re-extruded. Too slow and stringing may still occur; too fast and it can cause the filament to grind or strip. A good starting point is 25-40 mm/s. Experiment with slightly increasing or decreasing the speed, keeping in mind that speed can affect print quality and the rate of extrusion. Proper retraction settings are vital to achieving clean, detailed prints.
Optimizing Print Quality
Beyond the fundamental settings, several other parameters can dramatically improve your print quality. These adjustments allow you to refine the details of your prints and fix any issues. By understanding how these settings function, you can elevate your prints to a professional level. This fine-tuning process will improve the overall aesthetics and functionality of your 3D-printed objects.
Layer Height and Initial Layer Height
Layer height directly impacts the level of detail and print time. Lower layer heights (e.g., 0.1 mm) result in smoother surfaces and more detailed prints, but they also increase the print time. The initial layer height is the height of the first layer and is often slightly larger to improve bed adhesion. Experiment with different layer heights to balance detail and speed. Typically, a 0.2mm layer height is suitable for general prints, while detailed prints may benefit from a 0.1mm setting. Also, make sure the initial layer is properly compressed to adhere well to the print bed.
Infill Density
Infill density determines the amount of material inside the printed object. Higher infill percentages increase the strength and rigidity of the print but also increase material usage and print time. Lower infill percentages are suitable for non-structural parts. The optimal infill density depends on the object’s purpose. For functional parts, use 20-50% infill; for decorative parts, use 10-20%. Also, consider the infill pattern. Different patterns (e.g., grid, honeycomb, triangles) offer varying strength and print times. Experiment with these to find the best solution for your prints.
Support Structures
Support structures are essential when printing models with overhangs or complex geometries. Cura automatically generates support structures where necessary, but you can customize their settings. Adjust the support pattern, density, and interface layers to ensure the supports are easily removable without damaging the printed model. Using a higher density or a more intricate support structure can provide better support for complex geometries. Properly configured supports are vital for producing intricate designs without print failures. Experiment with different support settings to balance print quality with support removal.
Troubleshooting Common Printing Issues
Despite meticulous settings, printing problems can still occur. Knowing how to diagnose and fix these issues is part of mastering 3D printing. We’ll explore solutions to the most common issues. Troubleshooting will allow you to confidently resolve problems and maintain high-quality prints. By understanding the common issues, you can quickly adjust your settings to fix them, resulting in fewer failed prints.
Warping
Warping, where the corners or edges of a print lift off the bed, is a common problem, especially with materials like ABS. Warping is typically caused by uneven cooling. To prevent warping, ensure the bed is properly leveled and heated, and consider using a brim or raft to increase the contact area with the bed. Also, use an enclosure to maintain a consistent ambient temperature during printing. Adjusting your bed temperature, using an adhesive like glue stick, and reducing your printing speed can also help in preventing warping. Proper bed adhesion is the key to stopping warping.
Stringing
Stringing, characterized by thin strands of filament between parts, is usually caused by oozing during travel moves. This can be caused by incorrect retraction settings and/or temperature settings. Correct the retraction distance and speed. Also, lower the printing temperature, and ensure the hot end isn’t overheating. Stringing often requires fine-tuning of your retraction and temperature settings. Proper retraction settings are the best way to avoid strings.
Poor Layer Adhesion
Poor layer adhesion results in a weak print that easily falls apart. This can be due to a few factors. Increase the printing temperature, slow down the print speed, and ensure the bed is properly leveled. Also, check for nozzle clogs and ensure your filament is dry. It’s important to experiment to get the best results. In the meantime, check for proper adhesion on your first layer. This is vital to the rest of the print.
Advanced Cura Settings for Tevo Tarantula
For experienced users, there are several advanced Cura settings that can further refine prints. These require a better understanding of your printer and materials. By diving into these advanced settings, you can fine-tune your prints and maximize their quality. Using these advanced settings allows for greater control over the printer.
Z-Offset Calibration
Precisely calibrating the Z-offset is critical for ensuring the first layer adheres to the bed. It determines the distance between the nozzle and the print bed. A Z-offset that’s too high won’t stick. One that is too low will scrape the bed. Use the Z-offset calibration feature in Cura or your printer’s firmware to find the optimal value. You can test this by printing a small calibration model and adjusting the Z-offset until the first layer is smooth and properly adhered.
Flow Rate Adjustment
Flow rate controls the amount of filament extruded, and adjusting it can improve the accuracy and structural integrity of your prints. If the flow rate is too high, the model may have blobs and oozing; if it’s too low, the layers may not fuse together properly. Calibrate the flow rate by printing a single-walled cube and measuring the wall thickness. Adjust the flow rate setting in Cura until the measured thickness matches the intended wall thickness.
Benefits of Properly Configured Settings
Using the right settings allows you to achieve several benefits, including high-quality prints, better material usage, and a more enjoyable printing experience. The right settings will lead to excellent results. This process is key in making the most of your 3D printer and making sure the designs are created with a high level of quality. These efforts save time, material, and frustration, while also improving the overall aesthetics and functionality of your 3D-printed models.