Understanding Tevo Tarantula Slicer Settings
Before diving into the specifics, it’s crucial to grasp the role of slicer settings in 3D printing. The Tevo Tarantula, a popular DIY 3D printer, relies heavily on these settings to translate digital 3D models into physical objects. Slicer software acts as a bridge, converting the 3D model’s .stl or .obj files into G-code, the language the printer understands. This G-code contains instructions for every movement of the print head, the temperature of the nozzle and bed, and the flow of filament. Understanding these settings and how they interact with each other is paramount to achieving high-quality prints. Incorrect settings can lead to a variety of issues, from poor layer adhesion to complete print failures. The settings impact the outcome of the print, understanding is the first step to success.
Choosing the Right Slicer Software for Tevo Tarantula
Selecting the appropriate slicer software is the foundation for successful 3D printing with your Tevo Tarantula. While several options are available, each with its own strengths and weaknesses, some are particularly well-suited for this printer. The choice often comes down to user experience, the level of control over settings, and the software’s ability to generate efficient G-code. Compatibility is a major factor. Software that supports the Tevo Tarantula’s hardware is more likely to provide reliable and accurate prints. This includes support for the printer’s specific firmware and the ability to control features like heated bed and nozzle temperature. Consider features, ease of use, and community support for troubleshooting and learning resources.
Popular Slicer Software Options

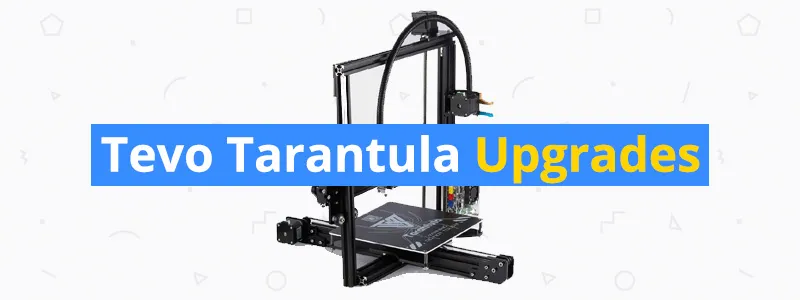
Several slicer software packages are widely used and recommended for the Tevo Tarantula. Cura is a popular choice due to its user-friendly interface, extensive settings options, and active community support. It offers a good balance of simplicity and advanced features. PrusaSlicer is another excellent option, known for its advanced features, including advanced support structures. Simplify3D, though a paid option, is also a favorite for its powerful features and sophisticated control over print settings. Choosing the right software is critical. Researching these options, trying them out, and understanding their specific features will help to determine which one best suits your needs and experience level. This is one of the first and most important settings for your Tevo Tarantula. See image Tevo Tarantula 3D printer.
Optimizing Print Speed and Quality
Balancing print speed and print quality is a crucial aspect of optimizing your Tevo Tarantula’s slicer settings. Faster print speeds can significantly reduce print times, but they can also lead to a decrease in print quality, manifesting as layer shifting, rough surfaces, or incomplete features. Slower speeds generally produce better-quality prints, with finer details and improved layer adhesion. Finding the optimal balance between speed and quality requires experimentation and understanding of the printer’s capabilities. Start with the printer’s recommended settings or a common starting point, and then gradually increase the print speed, observing the results and making adjustments as necessary. A key factor is the material, which will affect the print speed as well. Print speed image.
Setting the Right Print Speed
Print speed is a critical setting that significantly impacts the overall print time and the quality of the final product. Print speed controls how quickly the print head moves across the print bed, laying down each layer of filament. The optimal print speed for your Tevo Tarantula will depend on several factors including the type of filament being used (PLA, ABS, PETG, etc.), the nozzle temperature, and the complexity of the model. For most filaments, a good starting point is typically around 50 mm/s for the initial layer, which provides good adhesion to the bed. You can then increase the print speed for subsequent layers. Consider the infill speed, travel speed, and outer wall speeds for fine-tuning the process and maximizing speed, but always be aware that the quality will be negatively impacted.
Achieving High-Quality Layer Adhesion

Achieving strong layer adhesion is essential for creating durable and functional 3D prints. Layer adhesion refers to the bonding strength between successive layers of extruded filament. Poor layer adhesion can lead to prints that easily break apart. Several factors influence layer adhesion, including nozzle temperature, bed temperature, print speed, and the type of filament being used. Ensure that the nozzle temperature is within the recommended range for the filament. The bed temperature also plays a role, especially for materials like ABS, where a heated bed helps reduce warping and improves layer adhesion. The print speed is another factor to consider: slower speeds can improve layer adhesion. See image layer adhesion.
Calibrating Temperature Settings for Tevo Tarantula
Proper temperature calibration is fundamental to successful 3D printing with the Tevo Tarantula. Both the nozzle and the bed temperatures play critical roles in the printing process. The nozzle temperature determines the melting point of the filament, while the bed temperature ensures proper adhesion of the first layer. Incorrect temperatures can lead to a host of issues, including under-extrusion, stringing, warping, and poor layer adhesion. The ideal temperature settings vary depending on the type of filament used. PLA typically prints well at nozzle temperatures between 190°C and 220°C and a bed temperature of 50°C to 60°C. ABS usually requires a nozzle temperature between 230°C and 250°C and a bed temperature of 90°C to 110°C. PETG often prints well with a nozzle temperature between 220°C and 250°C and a bed temperature of 70°C to 80°C. The temperature will depend on the brand of filament.
Filament-Specific Temperature Considerations
Different filament types have different optimal temperature ranges, so it is important to adjust the temperature settings accordingly. PLA (Polylactic Acid) is a popular choice for beginners due to its ease of use and low printing temperature requirements. PLA typically prints well at a nozzle temperature between 190°C and 220°C and a bed temperature of 50°C to 60°C. ABS (Acrylonitrile Butadiene Styrene) is a stronger, more durable plastic often used for functional parts. ABS requires higher printing temperatures, usually between 230°C and 250°C for the nozzle, with a bed temperature between 90°C and 110°C to prevent warping. PETG (Polyethylene Terephthalate Glycol) is a good balance between strength and ease of printing. PETG typically prints at nozzle temperatures of 220°C to 250°C and a bed temperature of 70°C to 80°C. Make sure to check filament brand to determine the temperature for best result. See image temperature calibration.
Troubleshooting Common Print Issues

Even with careful preparation, 3D printing problems can and often do occur. The ability to recognize and troubleshoot these issues is an important skill for any 3D printing enthusiast. There are several common issues you may encounter, including poor bed adhesion, warping, under-extrusion, stringing, layer shifting, and nozzle clogs. Each of these issues has a set of potential causes and solutions. Poor bed adhesion is a common problem, usually caused by an improperly leveled bed, the wrong bed temperature, or a dirty print surface. Warping is another common issue, often caused by rapid cooling of the printed material. Under-extrusion, where not enough filament is extruded, can be caused by a clogged nozzle. Stringing is caused by the filament oozing between areas, often caused by the wrong temperature settings. See image bed adhesion.
Addressing Warping and Bed Adhesion Problems
Warping and poor bed adhesion are two of the most common and frustrating issues encountered in 3D printing. Warping is the tendency of the printed part to lift off the print bed, especially at the corners and edges, due to the cooling of the plastic. Poor bed adhesion is the inability of the first layer of filament to stick to the print bed. Several strategies can be used to address these issues. Ensure the print bed is properly leveled before each print. Use adhesive materials like glue sticks, painter’s tape, or specialized bed adhesives to improve adhesion. Increase the bed temperature slightly, especially for materials like ABS. Enclosing the printer can also help maintain a more consistent temperature. See image bed adhesion problems.
Adjusting Retraction Settings
Retraction settings play a vital role in preventing stringing and oozing, especially with materials like PLA and PETG. Retraction is the process where the 3D printer pulls back the filament slightly when the print head moves between different locations on the print bed. This minimizes the amount of filament that can ooze out of the nozzle, preventing the formation of thin strings or strands of plastic between the printed features. Adjusting the retraction settings involves two main parameters: retraction distance and retraction speed. Retraction distance determines how far the filament is pulled back, while retraction speed determines how quickly it is pulled back. If stringing is present, you might try increasing the retraction distance or the retraction speed. Finding the right settings requires some experimentation, but it can significantly improve the print quality. See image retraction settings.
Mastering Tevo Tarantula Slicer Settings for Success
Successfully printing with your Tevo Tarantula involves a combination of the right hardware, careful calibration, and precise slicer settings. By understanding these settings, you can significantly improve the quality of your prints, reduce printing time, and minimize common issues. Remember that 3D printing is a process of experimentation and refinement. Be prepared to adjust settings, learn from your mistakes, and enjoy the journey. With patience and persistence, you will be able to master the art of 3D printing and create amazing objects with your Tevo Tarantula. Practice, review, and document the process for best results.